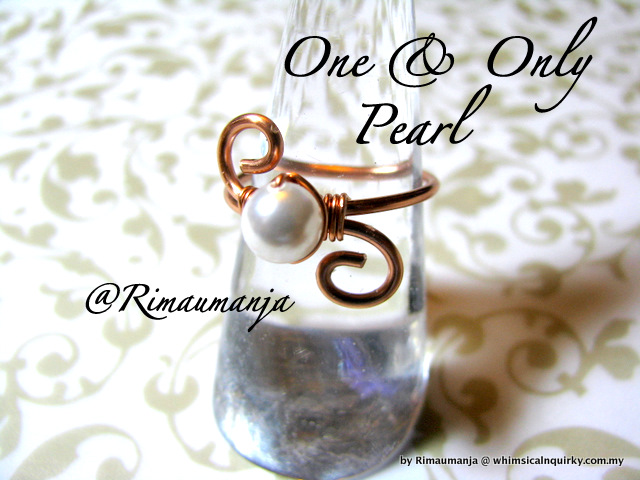
This is a very simple and yet lovely ring to wear. All you need is some wires ( not much), scraps are perfect and one single round 6mm bead. If you prefel larger size bead...you will probably need to use different wire gauges to suit that bead.
Materials i used for this free tutorial,
6mm swarovski pearl
16 gauge wire
24 gauge wire
Tools,
ring mandrel
cutter pliers
round nose pliers
flat nose pliers
chain nose pliers
ruler
wire filer
*******************************************
Begin directly from the spool.
Measure and cut the desired ring size.
Leave about an inch on each end from the point where wires meet at the centre.

cut wire away from spool.
File sharp wire ends with wire filer.

If you have 24gauge wire scraps from past projects,this is the time to use them.
You will need about 6-7 inches in length.

make 5 wraps around ring frame as in picture.

thread in one pearl bead.

position pearl across ring on overlapping point.


wrap wire tail around ring frame as in picture.


Then wrap wire tail around pearl.

Repeat wrapping wire tail around pearl bead.
On the 3rd or 4th wrap, wire tail position is at the back.

Then wrap that wire tail around ring frame 4 or 5 times, your preference.

Cut any excess wire.

Final step is to curve in both wire ends of ring frame.

DONE!


I hope you enjoyed this free tutorial.
If you need to ask questions and need further help with the handmade jewelry making tutorial, please email me at:
If you enjoy making this ring, DO share this FREE tutorial and link it back to this blog.
you can use this jewelry making tutorial to produce finished products for your own pleasure or for individual sale.
You are encourage to apply the techniques learned from this jewellery making tutorial to come up with your own creative works .
Please respect all intellectual property of WHIMSICALNQUIRKY handmade jewellery. PLEASE do not remove, amend or photoshop anything and use it for your personal gain while not giving credit to the author of this tutorial.
All cooperation is much appreciated.
Please respect all intellectual property of WHIMSICALNQUIRKY handmade jewellery. PLEASE do not remove, amend or photoshop anything and use it for your personal gain while not giving credit to the author of this tutorial.
All cooperation is much appreciated.
Copyrights 2010 @Rimaumanja,whimsicalnquirky.com.my